HOW TO TAKE MULTI-ROW PANORAMIC PHOTOS
In previous articles, we've looked at the question of whether or not to shoot large format photos, we've also discussed the dynamic range of a scene and looked at the basic options for dealing with compositions that are beyond the dynamic capabilities of our camera. In today's article, we'll focus on shooting multi-row panoramas, in conjunction with the exposure bracketing (AEB) method.
WHAT BASIC EQUIPMENT WE WILL NEED?
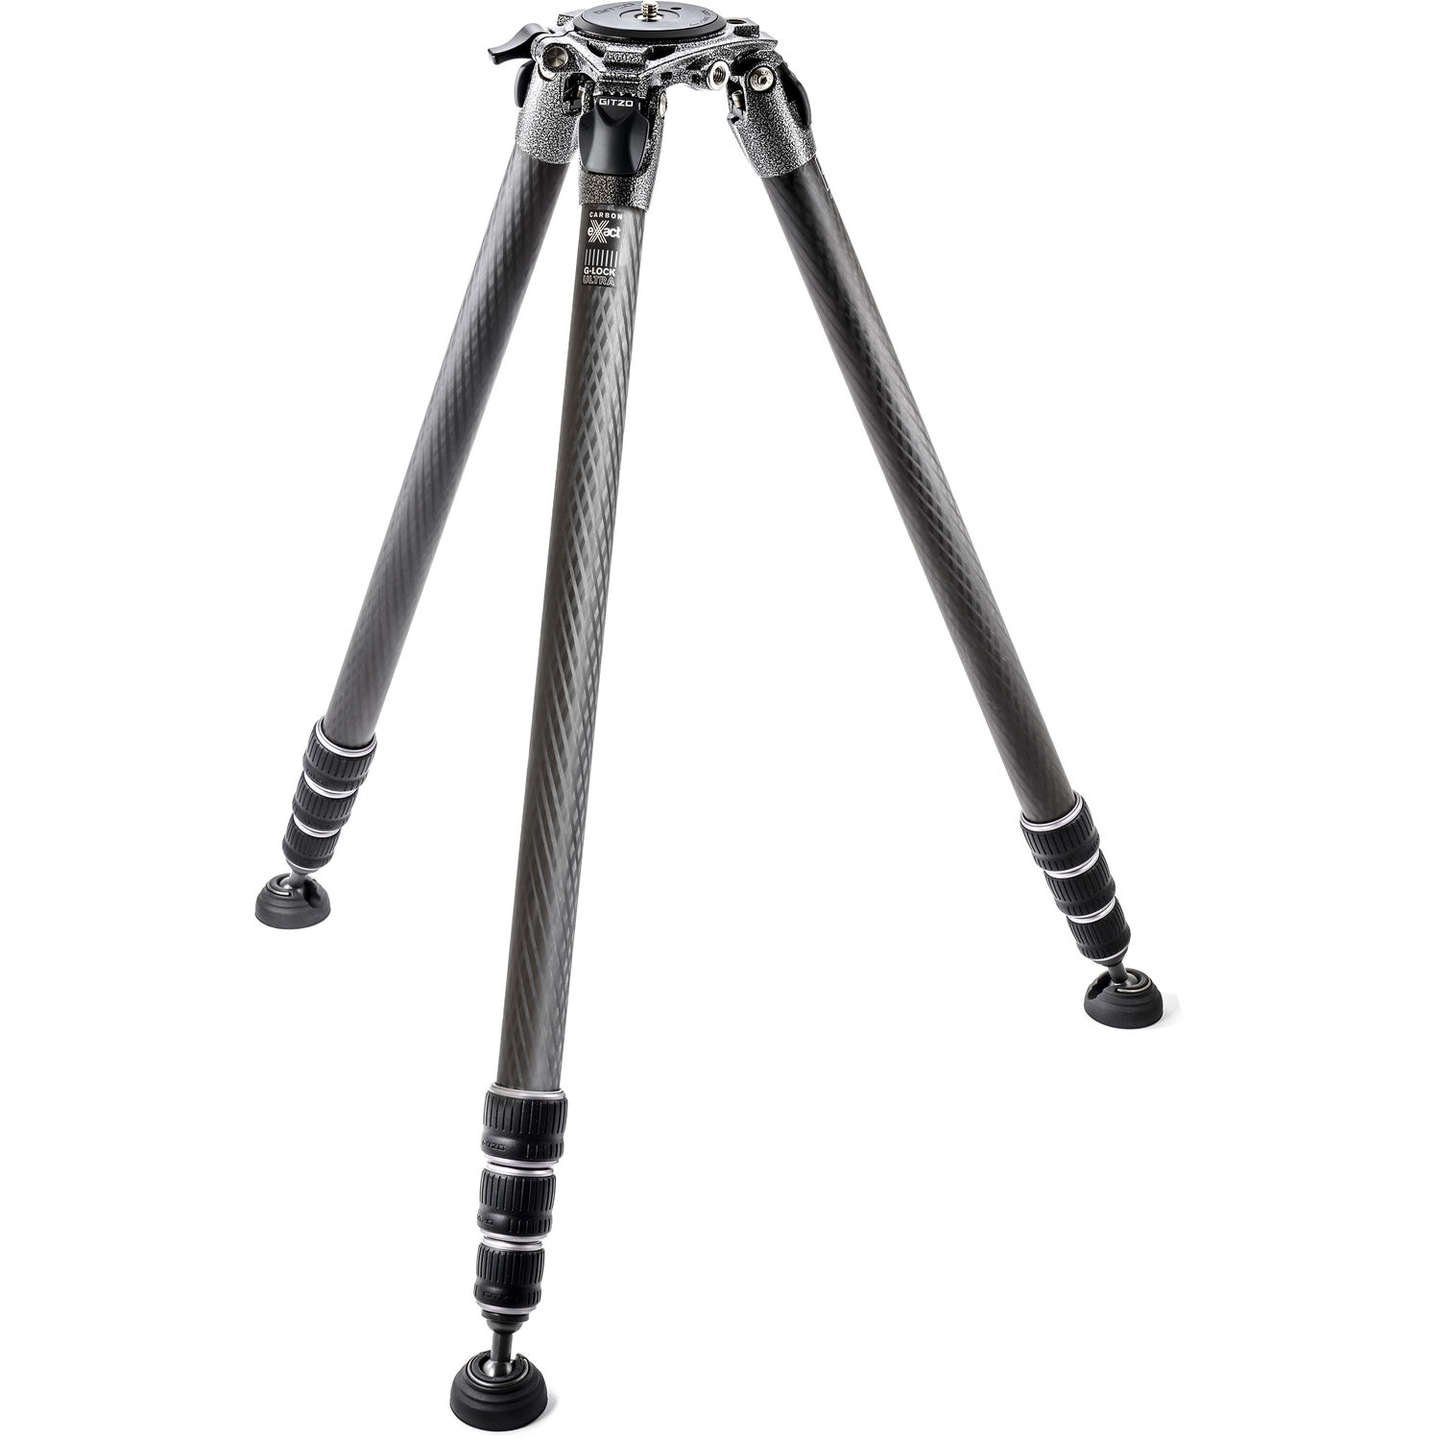
1. First and foremost, a tripod, which we practically can't do without - the reason for using a tripod is that we will be overlapping photos taken with the AEB method. It should be noted that it is relatively easy to overlay photographs containing any dynamics (e.g. cloud movement, flowing water, leaf movement, etc.). However, for panoramic images, where we are combining a large number of overlapping photographs, even in multiple rows, it is highly advisable to take the overlay photographs with real precision. It saves us a lot of time when editing on the computer.
2. A suitable tripod head. One common question is whether we need a special panoramic head. I'll be sure to please with the answer that no, we don't need one. De facto any head will do. Ideally it should have a panoramic shift, which for example the vast majority of even the cheapest ball heads have today. I'm currently using a massive Really Right Stuff BH-55 ball head, but in my photographic beginnings I shot all panoramas with a cheap Manfrotto joystick head that didn't offer panoramic shift. It worked, albeit with difficulty :)
3. A cable release is very handy - it eliminates unwanted camera shake that could be caused by pressing the camera's exposure button unwisely. Basically, cable releases come in two varieties - single-purpose and multi-purpose. Single-purpose ones have only one button, which is nothing more than a replacement for the camera's exposure button. Multi-purpose cable-operated triggers (I personally use the Aputure brand) have a display, are powered by monocells and offer a much wider range of options, especially burst shooting with a set time range. This feature is useful for astrophotography or timelapse photography. Both types of shutter release can be bought e.g. via eBay for very reasonable money. I honestly have to say that lately I've been lazy to plug the cable release into the camera. So instead I use a self-timer with a two second delay.
4. The camera supports automatic exposure bracketing (abbreviated as AEB). Fortunately, the vast majority of even old DSLR models have this feature and it allows us to take a sequence of usually 3 to 5 photos with an optimally set exposure range. In the absence of AEB, we would have to manually adjust the exposure values for each underlying photo.
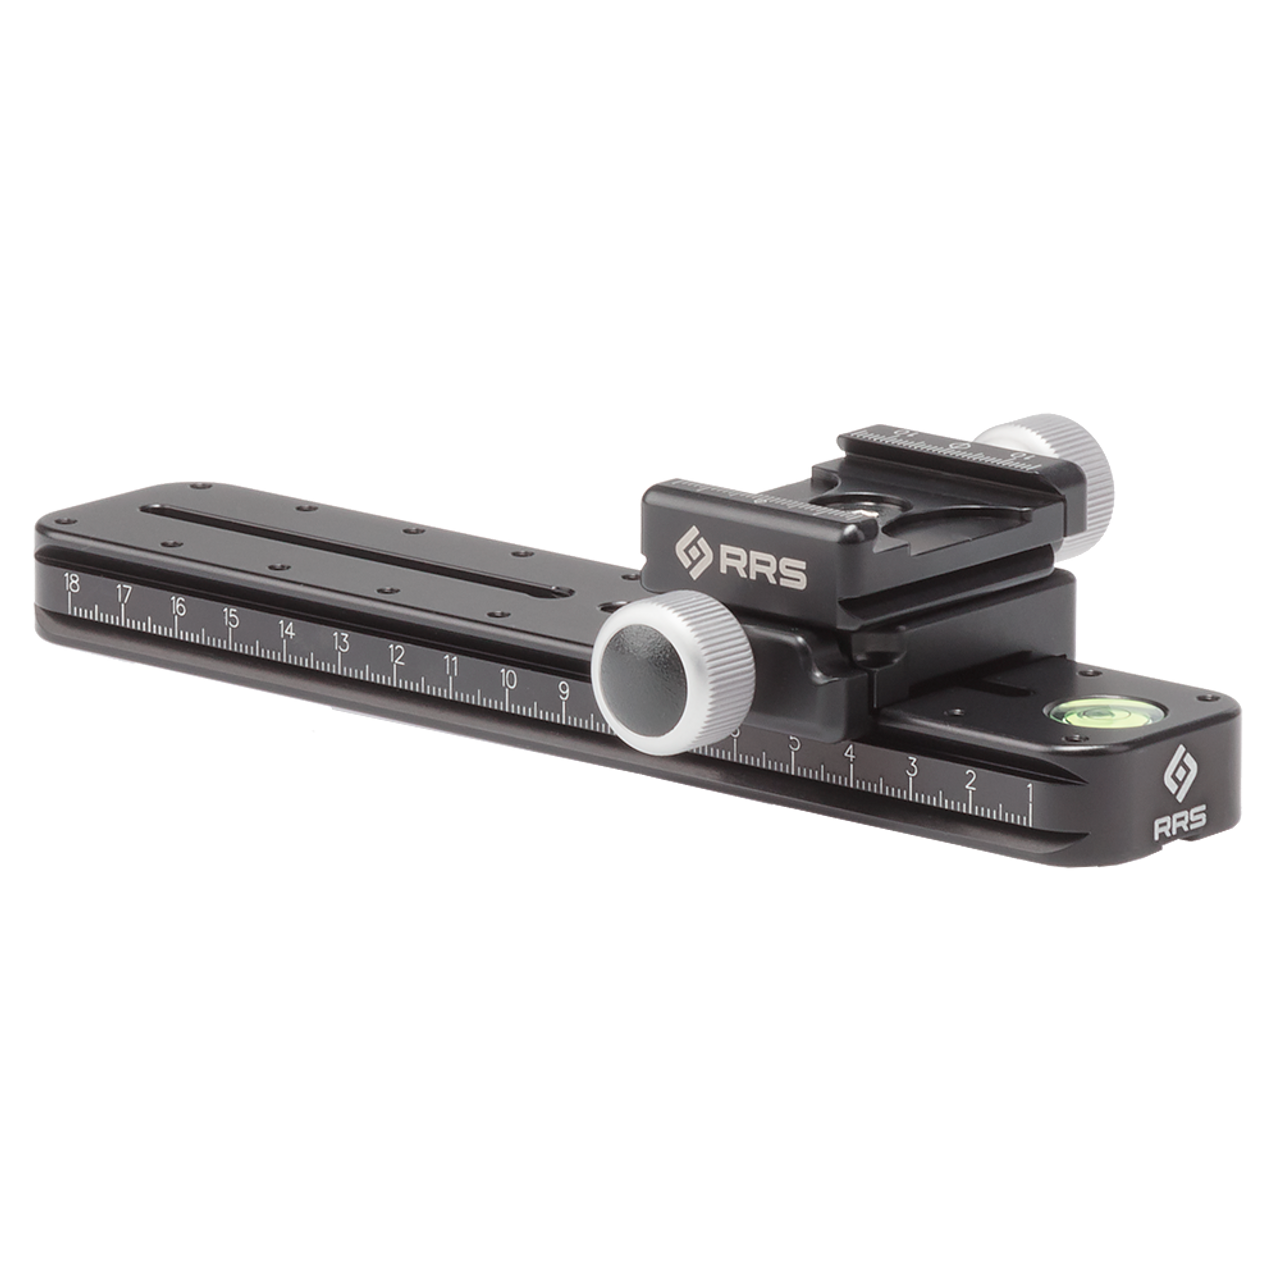
5. Nodal rail. Very simple replacement for expensive and large panoramic head. But it is enough to solve the problem with parallax (nodal point). Rails are sold in different lengths. Namely, according to the length of our wide lenses. Most of the time 14 or 18cm is enough.
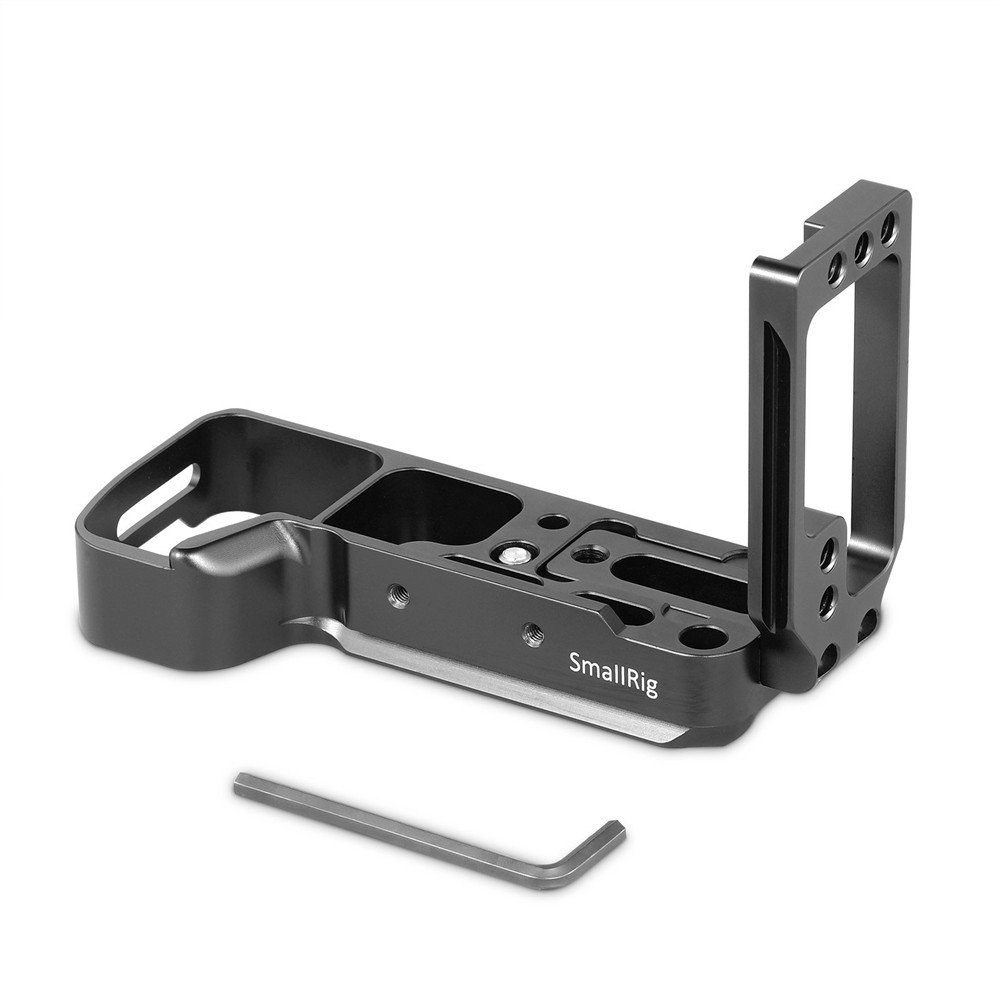
6. L-bracket. It is nothing but another kind of common tripod plate. However, it is not only below the camera. It is under the camera and on the side. This way, we don't have to tilt the camera sideways off the tripod axis when shooting vertically. We simply remove the camera from the tripod head from the horizontal position and turn the camera vertically.
EXPOSURE BRACKETING STEP BY STEP
If we have all the above equipment, we can go out into the field and try to shoot a multi-row panorama in combination with exposure bracketing.
First, we visualize our future photo, in particular whether we want to take a single- or multi-row panorama and what format we want to create. We then attach a suitable lens, turn the camera vertically and through the viewfinder or display (live view), compose our intended photo more precisely and look for the best place to place the tripod. Let's say we've found the ideal spot, pre-selected the focal point (if we're using a zoom lens) or selected a suitable prime lens and decided to divide the composition into, for example, a square of two rows with the camera turned vertically.
Then set up the tripod in the desired location. This stage is very important, as the tripod must stand level! One of the basic mistakes is that we level the camera, but the tripod itself stands crooked. When we subsequently take the underlying photographs, we then discover with horror in the viewfinder how the horizon line has drifted and by the time we bring the tripod into alignment, the ideal photographic conditions may be irretrievably gone.
As a next step, we set up our camera. Personally, I shoot all my photos in RAW output format. I have the program selector set to manual (M). I set the ISO value as low as possible (ISO 100 in my case) and choose the aperture. It's impossible to say which aperture is optimal as it depends on the composition, our creative intent and working with depth of field, plus the ideal aperture values of each lens are different, etc. But most commonly I use f11 aperture. However, there is one important fact to note - many beginners believe that the higher the aperture number they set, the sharper the photo will be. However, it is more than inappropriate to use the maximum aperture that the lens allows (most often f22). This is due to a phenomenon called diffraction, which often results in a dramatic deterioration of the drawing. This is why I personally try not to use apertures higher than f11. If we want to extend the time, it is better to use a good quality ND filter, and if we do not get the optimal depth of field, we can use the focus bracketing method (focus bracketing and its advantages/disadvantages compared to hyperfocal focusing will be discussed in more detail in a future article).
The next step is to focus the entire scene. Again, we need to consider how the entire large-scale composition will look and choose the optimal place to focus accordingly. Therefore, after focusing the composition, we lock the focus (or switch the lens to manual mode if we have been using the lens autofocus).
So we have our preferred aperture set, we've focused, and all that's left is to determine the exposure time. But how do we find the optimum time when the lighting conditions can vary significantly throughout the composition? It's simple. We need to turn on the automatic exposure bracketing (AEB) function and set the ideal exposure range. This will be based on the measured differences between the lightest and darkest part of the scene (the most common setting is -2/0/+2 EV).
Shooting photos should be as brisk as possible, especially when shooting in rapidly changing lighting conditions (sunrises and sunsets) or when there is a lot of dynamics in the scene (e.g. clouds floating in the sky). Simply start exposing the first photo, including the neutral and overexposed versions. Then rotate the camera, leave an overlap of about 25% and re-expose, etc. Once we've taken the selected number of shots, we've completed one series. We reexpose for the second row, leaving again an overlap of about 25% and continue shooting, but this time in reverse. If we add a third row, the process is repeated, however, we shoot in the same direction as the first row. The resulting camera movement thus looks similar to a recumbent letter "U" or letter "S" or its mirror-reversed variant (depending on which direction we started to rule the first row).

An example of the process of shooting a double-row panorama starting in the upper left corner. This is a panorama compiled from total of 18 frames (3-level exposure bracketing of 6 frames in two rows).

An example of the process of shooting a three-row panorama starting in the lower left corner. This is a panorama compiled from total of 45 frames (3-level exposure bracketing of 15 frames in three rows).
We should also remember that if we are to combine the images into a panorama, there must always be points of contact between adjacent photographs in the row and above. I have given about 25% as the optimum overlap, but sometimes a smaller percentage will do. However, if the photos do not overlap, then we will not be able to compose the panorama. This is especially important to keep in mind when recomposing from one row to another. It is also worth taking into account cropping the photographs if the resulting composition requires it. Therefore, it is better to take an extra frame in a row rather than to miss it later, even at the cost of using only half of it after cropping, for example.